This post is the third in my series of the 12 Days of Christmas DIYs for A Well Crafted Party. Check in each day for the next 12 Days for new DIY posts. There will be LOTS of free printables to boot! (Check out yesterday’s post: “Festive Holiday Drink Garnish”)
How to Make Copper Flatware Knock-Offs
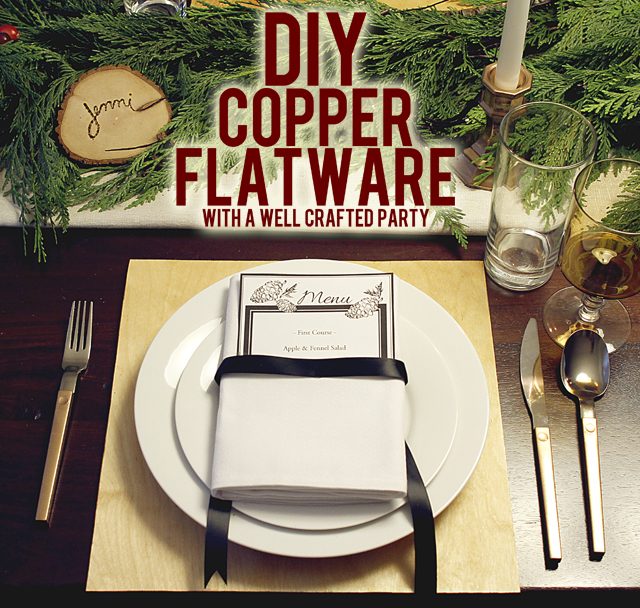
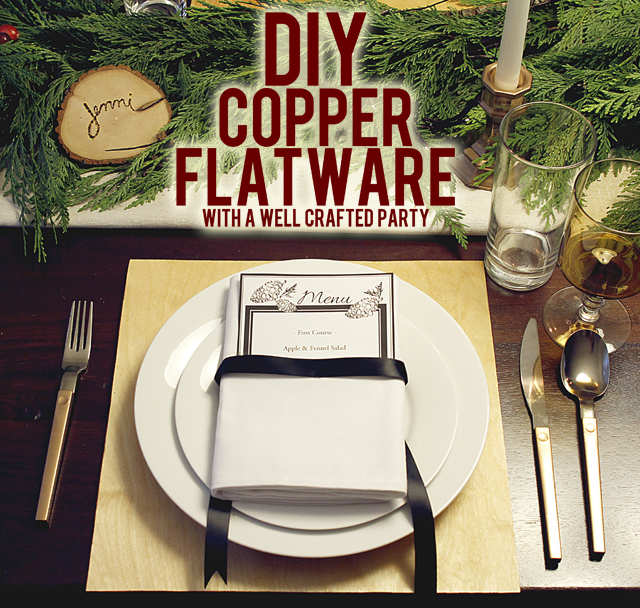
I’m obsessed with all the beautiful mixed metal, copper, rose gold and gold dinneware I’ve seen becoming more and more popular. Someday I hope to own some of these beauties from West Elm, but until then, I wanted something to give a similar feel at a fraction of the cost. These mixed metal DIY dinnerware ended up costing around $3 per set buying all supplies needed (I got enough for 8 sets)!
Now, I’ve seen a few different posts on spraypainting silverware. They are all GREAT! I wanted to share my process and what I did differently. One, I used copper instead of gold! I know that this isn’t a huge difference, but I’ve seen this done in gold before and wanted to give it my own small spin. I love gold, but the copper flatware gives the look a little bit of depth. Second, I used a silverware that was already two-tone. The two piece flatware from Ikea had a plastic handle that set it apart and when painted looked purposeful and helped keep it safer for eating.
A big thank you to the Tigrad, Oregon Orchard Supply Hardware store for the the painting supplies!
Copper Flatware DIY Supplies:
(Affiliate Links Below)
- Painters Tape
- Gloves
- Copper Spray Paint (I used Krylon Premium Copper Foil Metallic 1070)
- Clear Sealer ( I used Krylon Crystal Clear)
- Ostron Flatware from Ikea
Copper Flatware DIY Directions:
- Make sure your flatware is clean and dry. Do this with your gloves on to prevent the oils from your fingers messing up your paint.
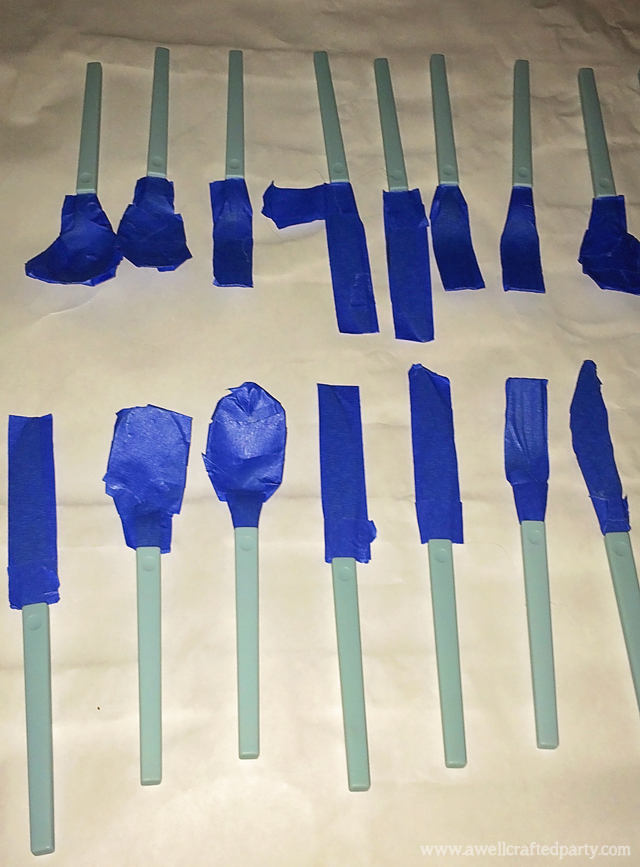
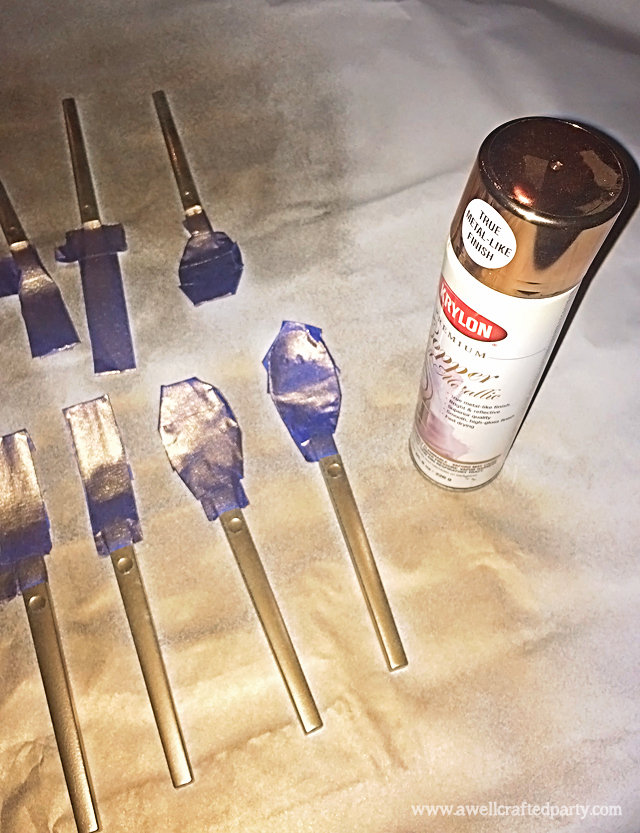
- Cover the eating utensil part of the flatware with painters tape. Make sure this is completely covered— spray paint is not food-safe.
- Put the dinnerware on a flat surface and spray according to the directions on the spary paint can. This may take a couple of coats, do so with 15 seconds in between coats.
- Turn the dinnerware using the paint-tape covered part of the flatware. Continue spraying and turning until the flatware is completely covered.
- Let flatware dry completely. Use your paint directions for drying times. The Krylon Premium paint was dry within 15 minutes, could recoat at anytime, and can be handled after 2 hours. This is not common for many spraypaints.
- After the flatware has dried completely and is completly covered in the copper color, cover in a clear coat according to the directions on the spraypaint.
I don’t have a dishwasher so I have not tested the flatware in the dishwasher. I hand wash carefully trying not to scratch the paint!
Do you want to see more from this Holiday Styled Shoot?
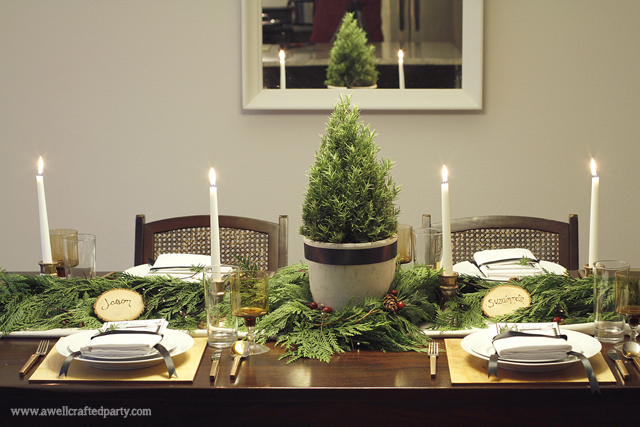
Photos from this project was from a recent Holiday Styled Shoot collaboration between myself and Suzannah of Create/Enjoy and Macey from Motormouth Studio. Check out my main post with links to DIY projects & recipes: “Natural Green and White Holiday Party + Free Printables”




13 Comments
This is such a great DIY for the holidays! I’ve painted wooden kitchen utensils before but never thought to do flatware. They look so great!
Marlynn [UrbanBlissLife] recently posted…12 Days of Holiday Giveaways: PackIt Freezable Bags
This is such a good trick! The tables looks like pottery barn, but for half the price! Great DIY
Rachel recently posted…Christmas Wishes 2014
I’ve always liked the festive look of gold flatware but never wanted to spend that much moolah on it, what a great alternative to get that look for much less!
Pech recently posted…Warming up with Flambée and Spaetzle at St Honoré
What a good idea! I am not great at crafts, but I could imagine these would make a sweet handmade gift. I could just see adding little jewels or a monogram to the handles to customize them. So cute!
I love your choice of copper, Jenni! It lends such a warm feel. I’ve never considered painting flatware – this is a great idea!
Renée recently posted…Heavenly Hollandaise {Recipe}
So beautiful for a holiday table! I am going to have to try it.
Oh my gosh! Gorgeous! So smart and elegant!
These are so pretty! What a gorgeous addition to the holiday table.
Catherine recently posted…Our favorite kids’ books: Singable stories
Pingback: DIY Wood Chargers - A Well Crafted Party
what a fab hack for entertaining! love the two-tone and copper advice. 😀
http://www.ladiesinnavy.com
kelsey recently posted…DIY Walnut Mouse Ornaments
So creative! I love your table setup as well!
Lindsay Ingalls recently posted…DIY Holiday | Coffee Brown Sugar Scrub
They look so good, great idea!
Kira recently posted…Pearl Plays PDX #7 – Zoolights at the Oregon Zoo
Pingback: Natural Green and White Holiday Party + Free Printables - A Well Crafted Party