This post is the forth in my series of the 12 Days of Christmas DIYs for A Well Crafted Party. Check in each day for the next 12 Days for new DIY posts. There will be LOTS of free printables to boot! (Check out yesterday’s post: “DIY Copper Dinnerware”)
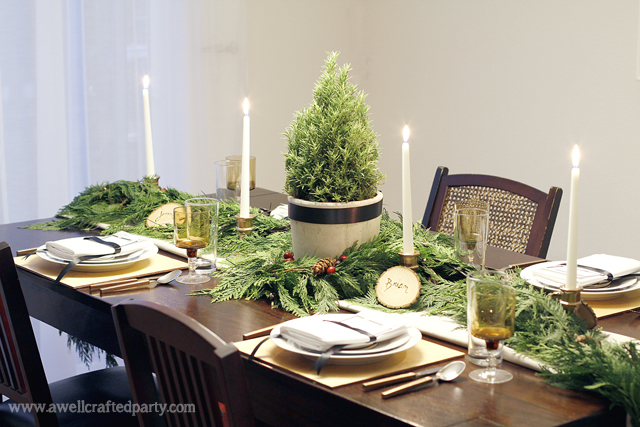
When working on the tablescape for the natural holiday collaboration with fellow Portland Blogger Suzannah of Create/Enjoy I really wanted to bring in more natural elements to the table that I hadn’t seen everywhere before. We discussed creating a natural linen table cloth or place mats. But, I wanted the pretty dark wood of Suzannah’s table to show through with the greenery, so I didn’t like either of those ideas. Then, suddenly, it came to me in one fell swoop while walking the aisles of Orchard Supply Hardware in Tigard, Oregon…. WOOD.
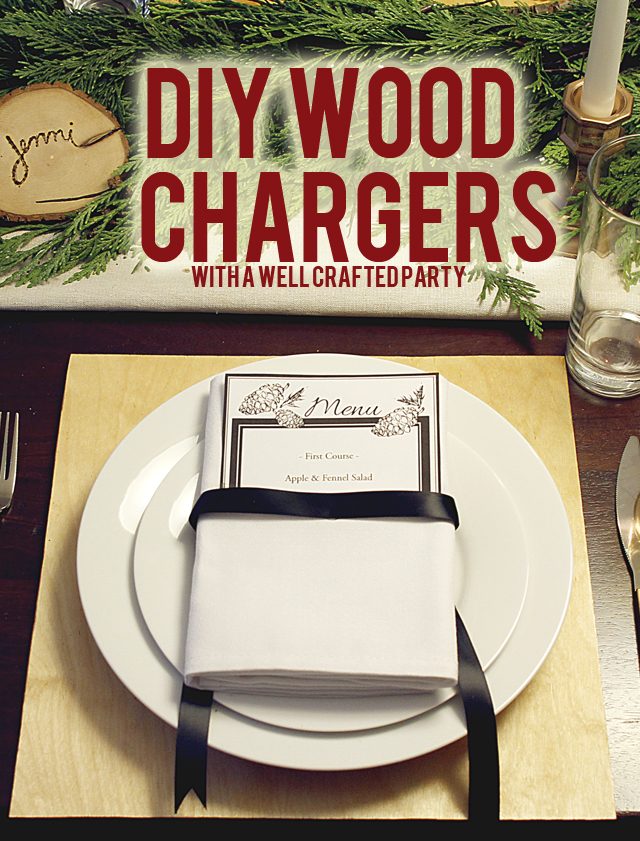
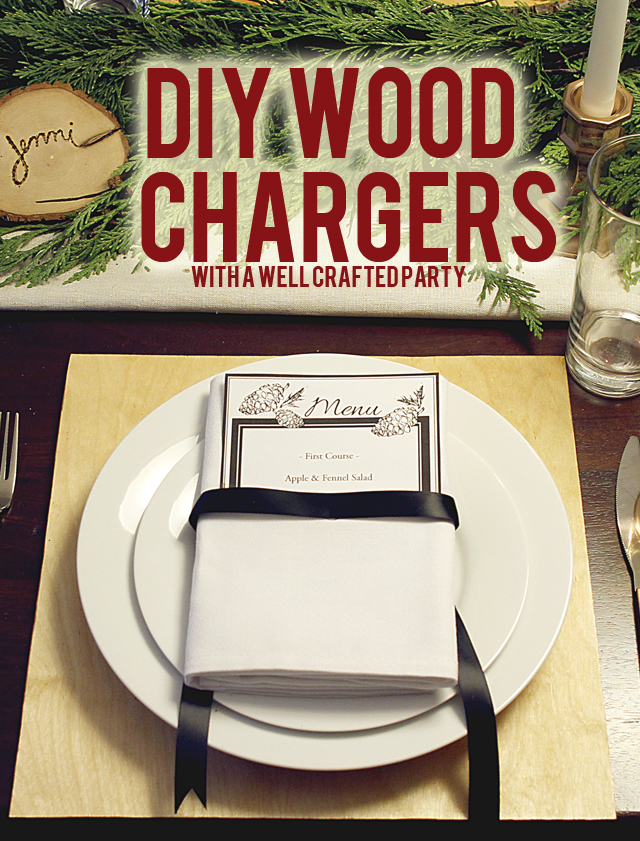
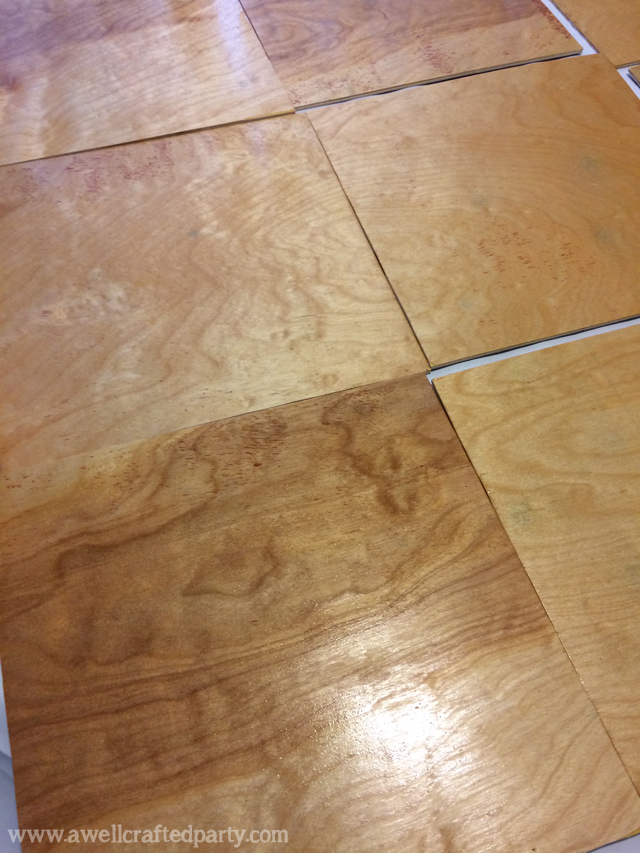
We had already used a big tree round as a stand for candles in the party. And, had I the right saw I might have taken the time to cut thin rounds from the tree to use for these chargers. Never to make things too hard on myself I decided to get a 1/4 inch thick piece of wood from Orchard and cut them into 12X12 squares. I liked the difference in shapes on the table, the wood had a darker side and lighter side so I could choice what looked best for the table, and they could double as platters for decor, food or drinks!
After a quick sanding, lacquer and copper edging these made for simple and beautiful holiday chargers. Plus, they’ll look fabulous on the table all year long!
How to Make Wood Chargers:
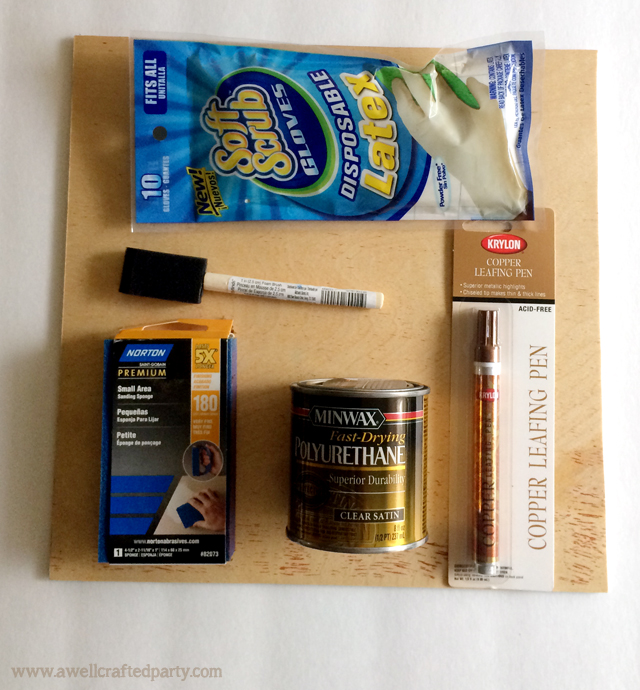
Supplies: (affiliate links below)
- Latex Gloves
- 12X12 Wood “squares” cut from your choice of wood that is 1/4 of an inch thick*
- Fast-Drying Polyurethane – I used MiniWax in Clear Satin, but a nice glossy one would look good too! I got a brush on style of polyurethane rather than a wipe on style. If you choose a different poly than I just follow the directions on the can rather than my instructions below!
- Copper Leafing Pen
- Sponge Paint Brush
- Sanding tool of your choice (You can use paper or a small sander. You don’t need much to get this job done. I used a 180 Sanding Sponge.)
*Wood cutting tip: We got a large sheet of wood for less than $10 at Orchard Supply Hardware. The wood can then be cut down into the 12X12 squares. To cut, measure your wood and draw your lines using a straight edge and pencil. This will make cutting the wood MUCH easier. Cut on the side you’d prefer to have up because the other side may splinter a bit. Follow all safety instructions from your cutting tool of choice. You may also be able to find wood pre-cut at crafting stores. The cost will be more however!
Directions:
- Take your wood squares and sand them lightly. Pay extra attention to any splinters that may be poking out and the edges of the boards.
- Wipe down the boards to get all dust off.
- Edge the boards with your copper leafing pen or a paint color of your choice. I used copper to go with the copper dinnerware I made for the tablescape.
- Put on your latex gloves and use the sponge paint brush to brush on a layer of the polyurethane to the top of your chargers in a well-ventilated space. The smell is CRAZY. Go ahead and get the sides while you are at it. Follow the directions to the polyurethane to dry your chargers. Mine took about an hour before I could touch them and get the other side. Once dry, brush on a layer of poly to the other side. Repeat these steps until you feel like your chargers are to the sheen/protectability that you’d like. I did 3 coats.
NOTE: These are not food safe. Do not put food directly on these boards. Do not cut food on these boards. These are merely a decorative item for a table. I like the idea of using these as a tray for a buffet table by setting a pretty platter or plate of food right on top!
Do you want to see more from this Holiday Styled Shoot?
Photos from this project was from a recent Holiday Styled Shoot collaboration between myself and Suzannah of Create/Enjoy and Macey from Motormouth Studio. Check out my main post with links to DIY projects & recipes: “Natural Green and White Holiday Party + Free Printables”. A big thank you to Orchard Supply Hardware for supplying the tools and supplies to make this craft. Check them out on Facebook!




19 Comments
I LOVE THIS! What a clever, unique, but simple way to add pizzaz to the table. This post makes me want to host a party.
Ashley recently posted…Do you see what I see? + GIVEAWAY!
What a great idea…and very Oregonian!
Melinda recently posted…Book Club Business: What to Suggest? 2014 edition
i love this diy! it’s gorgeous!
http://www.ladiesinnavy.com
kelsey recently posted…DIY Walnut Mouse Ornaments
Again so creative! Can’t wait to see what other DIY’s you have!
Lindsay Ingalls recently posted…DIY Holiday | Coffee Brown Sugar Scrub
Thanks Lindsay! Hahaha… tomorrow’s DIY is one of my favorites. Cocktails are involved! 😉 Thanks for stopping by the blog and commenting!
This is awesome! I’ve also noticed that Home Depot and Lowes will generally do free cuts if you buy the wood from them. If you go during a slow time and are really friendly, they seem to be willing to do a bunch of cuts for free 🙂
Emma Lincoln recently posted…I’m in The Holidaze
Thanks for the tip! That would be great for those out there that don’t have cutting tools at home. Thanks for stopping by the blog and taking the time to comment!
Another great DIY! I love that this style can be used for so many different party themes, too.
Marlynn [UrbanBlissLife] recently posted…12 Days of Holiday Giveaways: Queen Bee Creations
Loving how the table is coming together!!!
Rachel recently posted…Blogger Swap: Hunt and Harvest
Thank you! I was really pleased with how it all looked. I love it when an idea turns out alright!
Wow, great idea! Now if I just had a dining room table….or a dining room….:) Really lovely thought, the wood is gorgeous with the fresh greens.
Jenni @ JARFLY recently posted…A Winter Story
Hahaha… yes, the dining table helps with the tablescape. 😉 Thankfully Suzannah has a great table… the one at my house has paint spilled on it and a ton of scratches. Thanks so much for stopping by and commenting.
Great photos and tutorial!!!!! Love your 12 days banner, too!
Create/Enjoy recently posted…Holiday party appetizer recipes: Dried Cranberry & Pork Meatballs
Thanks lady!
Pingback: DIY Branch Holiday Card Holder - A Well Crafted Party
They turned out great—and very professional looking!
Catherine recently posted…Still thankful
Thanks so much! I was pretty happy with how they turned out. Next time I might try a stain too.
Pingback: A Well Crafted Party » Blog Archive Natural Green and White Holiday Party + Free Printables – A Well Crafted Party
Good job! A very unique table charger, I’m definitely trying this one. Thank you for sharing.
Luis Parker recently posted…8 Types of Saws: Their Uses (with Pictures)