This post is the forth in my series of the 12 Days of Christmas DIYs for A Well Crafted Party. Check in each day for the next 12 Days for new DIY posts. There will be LOTS of free printables to boot! (Check out yesterday’s post: “DIY Wood Chargers“)
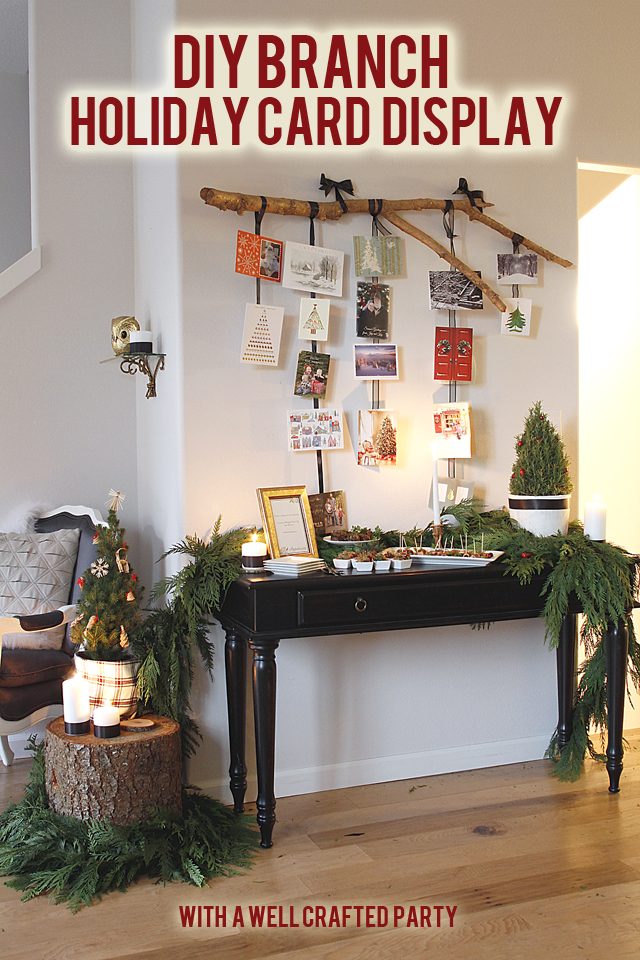
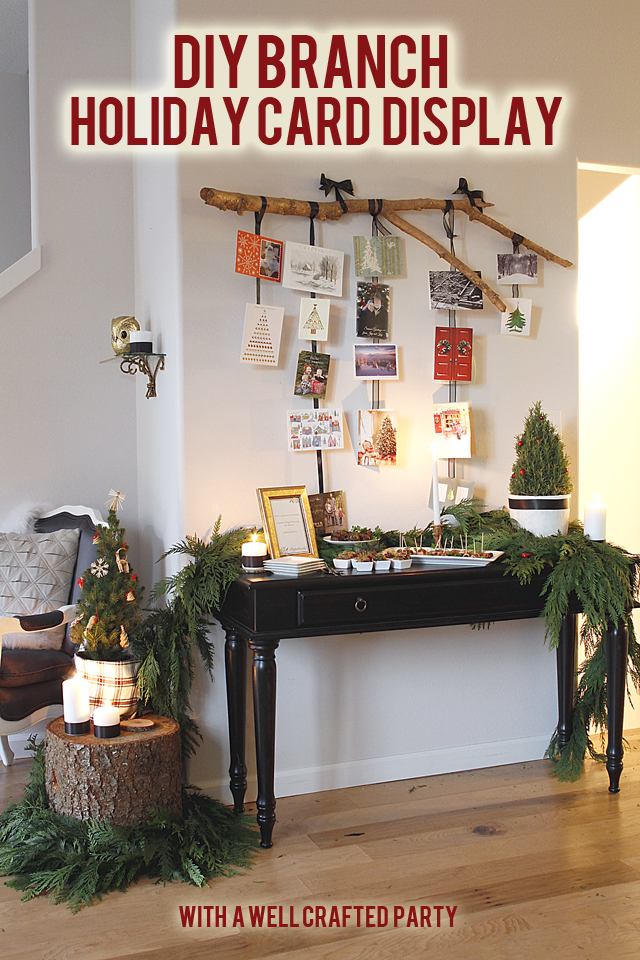
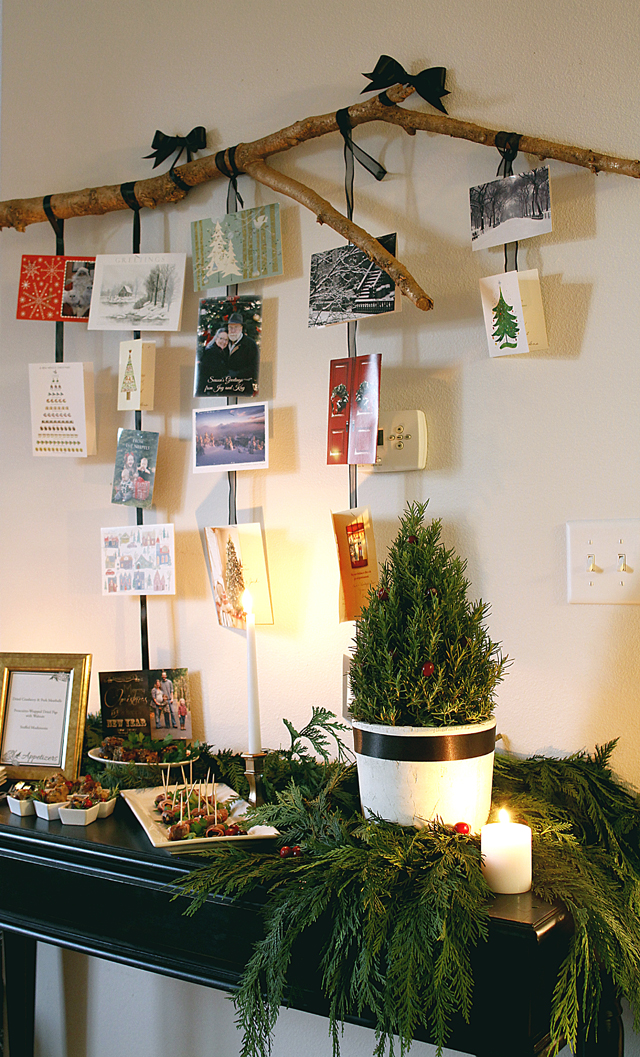
I love receiving (and sending) holiday cards. The problem is figuring out where to put said cards each year. Sometimes I display them on a cabinet. Other times of fridge gest covered. This year, I’m displaying them more promenitely… giving them the attention they deserve! This do-it-yourself project is super simple… the hardest part involves finding a branch!
DIY Branch Holiday Photo Holder Supplies:
(Affiliate Links Below)
- Gloves
- Copper Spray Paint (I used Krylon Premium Copper Foil Metallic 1070)
- Clear Sealer ( I used Krylon Crystal Clear)
- Sanding Sponge
- Branch
- Curtain brackets or nails for mounting
- Ribbon of your choice
- paper clips of your choice
How to make a Gilded Branch Holiday Photo Display:
1. Find a branch! This might be the hardest and easiest part of this whole ordeal. Before I lived in my house with a gigantic tree out in the yard I wouldn’t have been able to tell you where to find a branch. This branch literally fell into our yard after a big wind storm. Other ways to find a branch besides waiting on mother nature include trimming a tree or finding tree pieces ready to go out with the garbage. Please note that you should either be doing these things with your own trees or asking first… otherwise it might be a little difficult to explain to future employers that you got arrested for trying to make a holiday card display.
2. Trim off small branches and foliage. Our branch fell from a very large and old evergreen tree. It was covered in pine needles. My husband so graciously took the time to take off the offshoots for me, leaving me with a bare branch. (It is completely easy enough to do yourself, I just happen to be allergic!)
3. Sand down stumpy parts and dangerous edges. Don’t want to get splinters when putting up your holiday cards!
4. Spray paint! This is the fun part. You can totally leave your branch bare if you’d like… you can even take the bark off and sand down the branch for a beautiful bare branch look. I wanted my card holder to be gilded though! So, I sprayed the branch with the Copper Metallic spray paint until it had a pretty sheen. After drying I did a layer of clear sealer to try to prevent the paint scuffing off. (I should have probably done two layers as some of the paint scuffed up my friend’s walls during this photoshoot. EEK.)
5. Mount your branch. For this photoshoot we actaully just tied ribbons around the branch and nailed the ribbon to the wall. This is not the most sturdy solution. For day to day use I’d actually suggest mounting curtain brackets and placing the branch in those. You’d have to find brackets large enough to fit your branch, and then secure the branch by tighting the brackets around it. I like using the Ikea brackets on my wall throughout the year and changing out wall hangings for parties!
6. Hang ribbons on the branch to attach your holiday cards. Use a slip knot to tie on your ribbon. That way, at the end of the holiday you can easily pack away your branch. (Check out my ribbon backdrop wall for pictures of ribbons with slipknots!)
7. Hang your cards! As you receive your holiday cards and photos secure them to the backdrop using a paperclip, staple or glue dot!
More Holiday Goodies:
- Do you want to see another awesome holiday card holder DIY? Check out my Rain Or Shine’s Gilded Popscicle Stick Snowflake. You seriously have to see this!
- No holiday cards yet this year? Check out Suzannah’s MINTED giveaway!
Do you want to see more from this Holiday Styled Shoot?
Photos from this project was from a recent Holiday Styled Shoot collaboration between myself and Suzannah of Create/Enjoy and Macey from Motormouth Studio. Check out my main post with links to DIY projects & recipes: “Natural Green and White Holiday Party + Free Printables” A big thank you to Orchard Supply Hardware for providing a couple of the supplies to make this DIY happen!


12 Comments
So fun! The sanding part is where my patience always wanes thin, but I know it’s also one of the most important 🙂 What a great way to display holiday cards!
Marlynn [UrbanBlissLife] recently posted…12 Days of Holiday Giveaways: $250 at RingSide
Actually, me too. Thankfully on this one we only sanded down the pointy bits. I thought about taking off the bark and sanding it all down for a bare wood look… then, I thought again! 😉 I appreciate you commenting!
obsessed with this diy. it’s seriously chic!
http://www.ladiesinnavy.com
kelsey recently posted…Gift Guide: For Her/The Hostess/Your Gift Swap
Ahhh! Thank you! I loved how it turned out.
I wish I had read this post and had it in mind when we had the big windstorms earlier!
Pech recently posted…Portland Center Stage Twist Your Dickens, version 2014
Hahaha- I’m sure we will have some more and you can just stockpile them!
Gorgeous and so creative! Lovely idea for displaying holiday cards.
Denise @ Healthy Disney Family recently posted…See Jane Run Seattle race coupon
Thanks so much! I hate putting cards that people spent time/money on in a drawer… I like to keep them out for the holidays! Thanks for stopping by the blog and commenting. 🙂
Yay!! It’s a great idea, I kind of miss having it up to collect this year’s cards!
Create/Enjoy recently posted…Holiday card time! Minted giveaway!
Pingback: Saturday Spirits: Chocolate Peppermint Martini - A Well Crafted Party
Pingback: Diy Card Display Stand | Desktop Decorating
Pingback: Top 5 Holiday DIYs of Christmas Past – A Well Crafted Party