Category

Desserts

Category

So, a few things before I share this recipe with everyone:

  1. I am not a nutritionist. I am not a doctor. I am a mom who likes to cook. That being said, I do know a little about things like calories, sodium, sugar intake etc. 
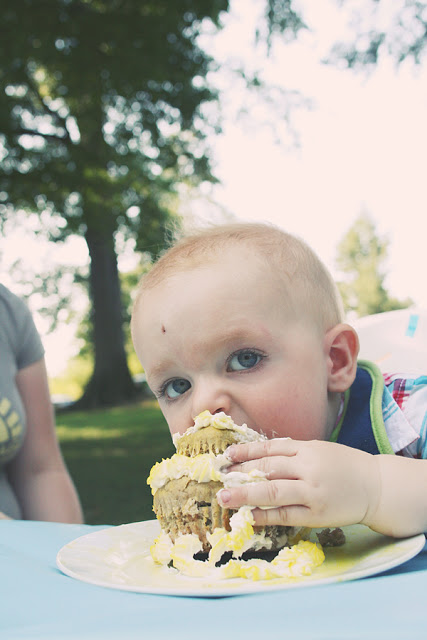
  2. I have no problem with sugar. I like sugar (a little too much). And, I don’t think it is a bad idea to introduce sugar to a child as long as it is managed. That being said, my son had not had sugar other than fruit (a whole different type of sugar) and exactly one bite of vanilla ice cream before he turned one. I didn’t want to load him up with sugar on his birthday. 
  3. I like cake. I love making cakes. I someday hope to share that love with my son. I wanted him to have a little smash cake on his birthday… so, I came up with a recipe that was tasty but didn’t load him up on a bunch of unnecessary fats & sugars.
  4. This is not gluten free. It is not dairy free. It is not vegan. It is not made with super awesome, healthy grains. This could be a whole bunch healthier. Personally, I probably wouldn’t eat it then. 

Now that bit is over with… this cake was TASTY. The cake was basically a normal easy cake recipe where I substituted banana for sugar and applesauce for oil/butter (another thing I wanted to cut back on in his first treat). The frosting was whipped cream cheese with a touch of vanilla and a touch of powdered sugar. The cake consistency was close to muffin rather than cake. But, it was a small price to pay when cutting out butter/oil!

(The smash cake did have a food coloring spray to make it yellow. I opted out of putting it on the cupcakes that all the other kids were eating.)
Funny thing about this cake… everything on the sweets table was melting in the sun at my little man’s party. Everything but this cake. They looked and tasted perfect the entire time! Thanks to Motormouth Studio for the pics!

Kid-Friendly Banana Cupcakes
Estimated Time: 28-25 minutes, Approximately 24 standard sized cupcakes

Ingredients
  • 1 cup smashed and strained banana
  • 1/2 cup applesauce
  • 2 cups cake flour
  • 3 large eggs
  • 2 teaspoons baking powder
  • 2 teaspoons vanilla
  • 1/2 teaspoon salt
  • 3/4 cup milk
Directions
  • Preheat oven to 350 degrees F
  • Prep cupcake tin with liners
  • Sift (I like to throw my dry ingredients in a food processor instead of sifting) flour, baking powder, and salt together in one bowl.
  • In another bowl, mix together the apple sauce, banana, eggs, milk, and vanilla. Whisk just a little bit so that they are fluffy. 
  • Slowly incorporate the flour mixture into the apple sauce mixture.
  • Spoon batter into cupcake liners (a hefty amount, but not too full… about 3/4 the liner works great)
  • Bake for approximately 18 to 25 minutes. The bake time varies with different ovens. If a toothpick is put in the center of the cake and comes out clean then the cupcake is done!
  • Let cool and top with frosting. Right before serving add a slice of banana to the top.

Now, I couldn’t go and make a healthier cupcake and then top it with sugary frosting. But, come on.. a cupcake just ain’t a cupcake without frosting. So, I opted to put a dollop of whipped cream cheese frosting on top. I made WAY too much frosting. So, if using this recipe plan on either putting on more frosting per cupcake, attacking frosting with a spoon, or saving it to go on a batch of cinnamon rolls!

Whipped Cream Cheese Frosting:

Ingredients:
  • 1 Large bowl, 1 kitchen mixer (hand held or standing work… you could do it by hand and not powered, but you have to have more muscles and time than I have!)
  • 2 packs of cream cheese (pretty sure that is 16 oz) at room temperature (very important)
  • 1 teaspoon vanilla
  • 1 tablespoon powdered sugar (this is significantly less than regular icing)
Directions:
  • Whip cream cheese in large bowl until fluffy.
  • Mix in vanilla and powdered sugar until incorporated.
  • Put in piping bag and pipe a dollop onto each cupcake
If you end up making these cupcakes (or a variation) I’d love to hear about how they turned out! 
Mmmm… birthday cake. Is there anything better?
I really enjoy making my friends birthday cakes or cupcakes. I like to play around with flavors and frostings. I like using things I have on hand or going to buy something special. I made this cake  (featured in the Rustic Birthday Party Post from yesterday) using some of the sweet potatoes that came in my weekly veggie box delivery.
And, boy oh boy was it a good use of vegetables!
The cake didn’t look perfect. My frosting job was a little wonky. But, it tasted pretty awesome.
The sweet potatoes made the cake moist. The marshmallow gave the frosting a fun kick.
Then, the crunch of the walnuts made me want another slice.
Sweet Potato Cake Recipe
Recipe loosely based on epicurious.com recipe
changes and additions made by me
INGREDIENTS:
  • 4 8-ounce red-skinned sweet potatoes(yams)
  • 2 3/4 cups all purpose flour
  • 3 teaspoons pumpkin pie spice
  • 1 teaspoon baking powder
  • 1 teaspoon baking soda
  • 1/2 teaspoon salt
  • 1 1/2 cups sugar
  • 1/2 cup maple syrup
  • 3/4 cup vegetable oil
  • 4 large eggs
  • 1 teaspoon vanilla extract

Topping:

  • Marshmallow Buttercream Frosting (see recipe below)
  • Walnuts (or pecans)
DIRECTIONS:
1. Poke yams with fork and bake until tender (about 1 hour at 375 degrees F). You can also do this in the microwave or used leftover mashed sweet potatoes ( approximately 2 cups worth). Peel yams and smash once done.
2. While yams are baking prepare a pan for cooking. You can use a muffin tin with liners for cupcakes. I used a springform pan and sprayed it with a little cooking spray and dusted it with a little bit of flour to prevent sticking. Preheat oven to 325 F.
3. In a medium bowl sift together (or put in bowl and stir around with a whisk or fork) flour, pumpkin pie spice, baking powder, baking soda, and salt.
4. In a large bowl mix 2 cups of (cooled and mashed) yams with sugar, vegetable oil and syrup. Then mix in eggs 2 at a time. After mixing in eggs add in the flour mixture and mix until just incorporated. Add in vanilla extract and mix one last time. (I use a hand-held mixer, but if you are lucky enough to own a kitchen aid stand mixer then I’m sure that would work as well.)
5. Pour cake batter into prepared pan. Bake at 325 for about one hour or until a toothpick inserted into the center of the cake comes out clean.
After the cake was done and cooled I sliced it in half, brushed the tops with a little bit of whiskey (a simple syrup would work as well) to keep it moist, and then frosted it. I put marshmallow icing and walnuts on the first layer before addign the top layer. I then frosted the entire cake with marshmallow icing and topped with walnuts.
Marshmallow Buttercream Frosting
I improvised this frosting recipe using my basic butter frosting as a base
INGREDIENTS:
  • 2 sticks butter- room temperature
  • 1 8 oz jar of Marshmallow Cream
  • 2 cups powdered sugar
  • 1/2 tsp salt
  • 1 tsp vanilla
  • milk or cream if needed for consistency
DIRECTIONS:
1. Whip up two sticks of room temperature butter until fluffy. (I use my handheld mixer.)
2. Add in 1 8 oz jar of Marshmallow Cream- whip until incorporated. I spray my handheld mixer with a little bit of cooking spray to help keep the marshmallow cream from sticking to my mixer.
3. While mixing, slowly add in powdered sugar.
4. Add in vanilla and salt and mix.
5. If the frosting is too thick add in tsp of milk or cream. If it is too runny add in a little bit more powdered sugar. I found that I usually don’t need any additional milk or sugar.
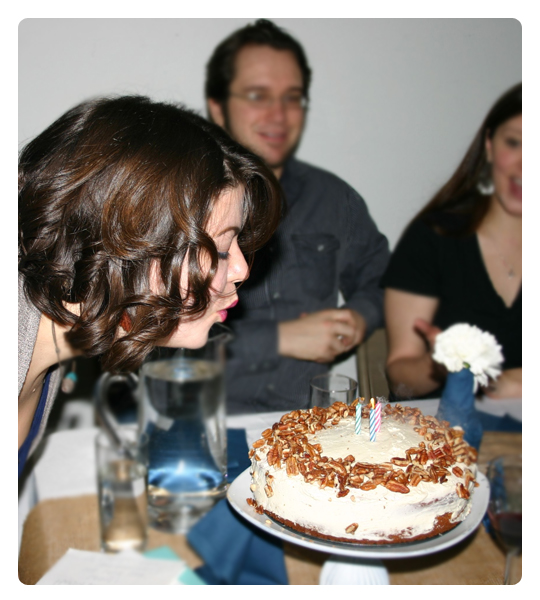
Add candles and a song and then you’ve got yourself a birthday cake!
I’d love to know if you decide to make this cake.
*I’m a big fan of cupcakes.*
They are the perfect ratio of cake to frosting for me. I really love collecting cupcake liners and creating fun cupcake combinations… So, today I’m going to give you recipes to two cupcakes I made this year for my husband’s birthday.
First up: Mocha Cupcakes!
*This post is a little picture light as I forgot to take step by steps of this recipe. But, it is easy and I’ve got some great links for you!*
Whenever I make a basic chocolate cake I look to Martha for a good recipe.
I tend to tweak things a little as I go to my tastes… but, the base recipe for this cupcake is Martha Stewart’s Devil’s Food Cake batter. Got to give Martha her props!
The following includes the changes I made to give them more of a Mocha flavoring.
Cupcake Ingredients: 
 —1 cup Dutch Process Cocoa Powder
—1/2 cup plus 2 tablespoons brewed coffee
—3 3/4 Cake Flour (Martha calls for sifting but I rarely sift)
—1 1/4 teaspoons baking soda
—3/4 teaspoon coarse salt (I used ground sea salt)
—3 3/4 sticks butter (softened)*
—2 3/4 cup sugar (I use baker’s sugar because it is a little more fine)
—1 Tablespoon + 1 Teaspoon Vanilla Extract (only the real stuff people!)
— 5 Large Eggs (Room Temp)*
—1 1/4 Cup Whole Milk flavored with coffee beans**
* I don’t do microwaves and like most people (I assume) leave my eggs in the fridge… so, when I start getting out ingredients and getting ready to put all these things together I always set my butter and eggs out on the counter first. Hey, while you are at it go ahead and set more butter out because you’ll need it for the yummy frosting.
** This is the secret to making these puppies taste like a good cup of Mocha rather than just a delicious choco cupcake. I learned how from the Cupcake Project.
(yep, an entire blog devoted to cupcakes. swoon.)
Image Source
Cupcake Directions: 
 
Pre-heat oven to 350 degrees. Put liners in cupcake tin.
1. Mix cocoa and hot brewed coffee in a bowl until smooth. Let cool.
2. Mix flour, baking soda, and salt into a medium bowl.
3. In a large bowl beat butter and sugar with a mixer on medium speed until pale and fluffy, 3 to 4 minutes. Beat in vanilla. Add eggs, 1 at a time, beating well after each addition and scraping bowl as needed.
3. Pour coffee flavored milk into cocoa mixture in a slow, steady stream, whisking until smooth.
4. With mixer on low speed, add flour mixture to butter mixture in 3 additions, alternating with cocoa-milk mixture, starting and ending with flour mixture. Use immediately.
Pour into cupcake liners. I like to pour them in about 2/3 full to get a flat top to put yummy frosting on… but, I’m not great at this and sometimes I get a rounded top. Check out this awesome post by Kelly Neil regarding filling cupcake liners!
Bake approximately 22-25 minutes. This will depend on your oven and the weather most likely… I always check after about 20 minutes and see how they are doing. If in doubt at all stick a toothpick in them… if the toothpick comes out clean they are DONE!
Cream Cheese Vanilla Frosting:
I am LAZY with my frosting. I do make it from scratch…. but, I stay away from any frostings that call for cooking things or that deal with egg whites. Give me a good butter frosting. yum. This frosting is a basic butter frosting with the addition of cream cheese because I don’t like my frosting too sweet and it pairs really nicely with the mocha goodness of this cupcake. Well, and everything is better with cheese.
 Frosting Ingredients: 
—2 packages of cream cheese (8 oz each)
—1 stick of softened butter
—2 cups powdered sugar (the fresher the better)
—1 tsp vanilla extract*
—1/2 teaspoon salt (or to taste)
*Another yummy way to do this is to substitute the vanilla extract for vanilla bean and 1 tsp. heavy cream. So tasty!
Frosting Directions:
  Mix all ingredients for what seems like forever, until it is a smooth, frosting-like consistency. 
Put in piping bag and pipe away! 
After putting on frosting I then shaved some milk chocolate onto the top for garnish. 
Another great garnish would be chocolate covered espresso beans.  
I’d love to know if you end up making these!!