I love when I go into a party and I see fresh flowers. But, I also know that fresh flowers can be expensive! Lately, I’ve been really into creating floating floral centerpieces because they are more cost effective and just plain gorgeous.
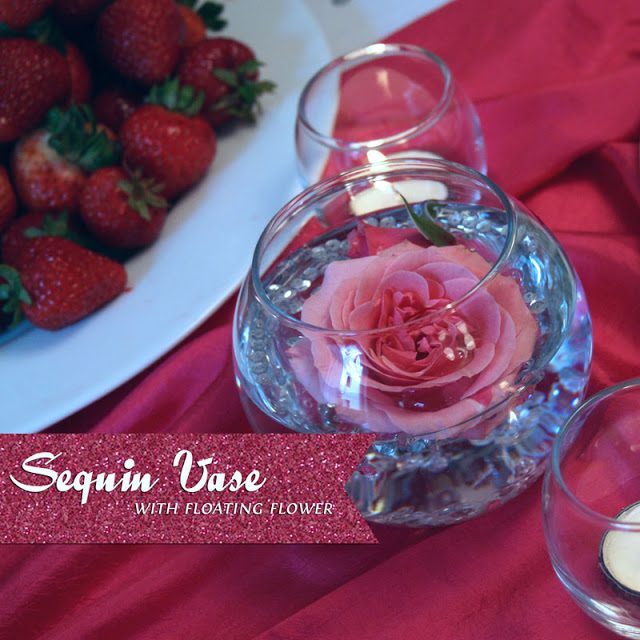
Yesterday I shared a few photos of my friend Suzannah’s Pink and glamorous 25th birthday party. One of my favorite DIY decor elements was the sequin vases filled with floating flowers.
This simple DIY only cost me around $2 per centerpiece! Using only some round vases from the Dollar Tree, a little glue, a bag of sequins from the local craft store, and a small bunch of roses I was able to create several of these little beauties.
How to create your own sequin vases with floating flowers:
- Gather your supplies: 1 vase, glue, paint brush, sequins, water, flower, and scissors. I used Elmer’s glue. Mod Podge would also do well. I also prefer roses for this type of centerpiece, but many other flowers would look just as gorgeous. I just happen to love how the rose looks all opened up and floating in water.
- Using a paintbrush, paint a thin layer of glue on the bottoms and sides of the vase.
- Pour sequins in vase and shake until covered. Let dry.
- Prep flowers by cutting the flowers at an angle at the place that the head of the flower meets the stem.
- Pour water into the dried vase. Some of the sequins will come loose and float to about an inch or two from the top of the vase. I like this and left it that way for the party.
- Drop the flower head into the water with the petals facing upwards. If you are using a rose and it hasn’t opened up just yet, lightly fluff the petals with your fingers or open the bud with running water. Be careful not to open the bud too quickly, as it may fall apart.
Have fun creating these fun, inexpensive, and beautiful floral arrangements! I’d love to see a photo if you do this at one of your future events!


