Category

Uncategorized

Category
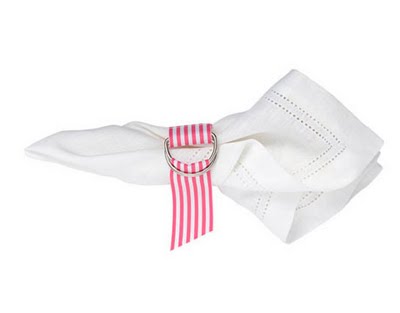
Don’t forget to enter to win these fabulous grosgrain napkin holders from Social Couture!
The winner will receive their color choice of napkin rings–perfect for any upcoming summer parties!
Color choices include: 
 lemongrass, coral, navy/white, red/white, pink/white, lime/white, navy/pink/white (new), green/navy/white (new)
This awesome giveaway ends TOMORROW NIGHT! 
to enter! (It is super easy!) 
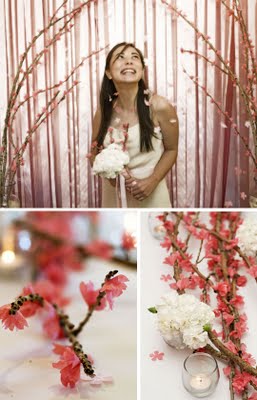
If you are a fan of the Love in Blossom photoshoot that I featured a while back…
 (and that was featured on Hostess with the Mostess)

then you were possibly waiting for these DIY posts!

**By the way, if you use any of these DIY projects I’d LOVE to see pictures!**

Just e-mail me at Jenni[at]awellcraftedparty.com
Well…with no further hullabaloo…
 ~*~

DIY Cherry Blossom Chopstick Holders

I’m a big fan of chopstick holders. I have a whole collection of really adorable ones that I use whenever setting a table with chopsticks. So, for this party I wanted to have some fun DIY holders that could also serve the purpose of a place card. These blossoms are made from just printing out a free printable and following some simple directions.

Supplies:
Cherry Blossom Printable PDF

(Click the Above Link to Get the PDF)
Pink Cardstock
Scissors or Exacto Knife
Hot Glue & Glue Gun
Pen or Pencil
Calligraphy Pen

Step One:
Print the Cherry Blossom PDF on pink card-stock.

Step Two

Cut Out blossoms and stands using scissors or Exacto Knife.

Step Three

Fold stands on dotted lines.

Glue the solid dot to the empty dot on the opposite side of the stand.
This will create a triangle shaped stand.

Step Four
Use the calligraphy pen to write guest’s names on each blossom.

Step Five

Curl the edges of the blossoms using a pen or pencil.

Step Six

Glue each blossom to a stand at the flower image on the stand to the back of the blossom.
Rest chopsticks on the Cherry Blossom Chopstick Holders.

Note: If your do not like your handwriting you can add text in each blossom within an Adobe Reader, Illustrator or Photoshop.

BIG THANK YOU

to Hostess With the Mostess for featuring this DIY
and to Capturing Grace Photography for taking such beautiful photos!

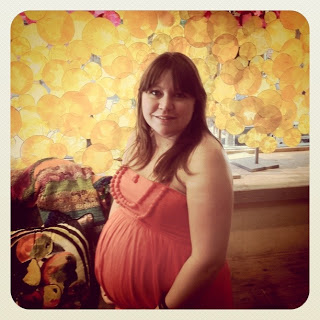
If you know me (or possibly if you read my blog regularly) you would know that I am a *little bit* of a control freak. I like my lists, my calendar and organization. One of the hardest parts of being pregnant for me has been losing some of the control I’m used to having. (And, I suppose that it is good that I have been going through this now as I am sure to have even less control adding someone else into my life.) Thankfully the last few months have given me back a little bit of my ability to handle tasks and complete many of the items on my to do list. Unfortunately… I don’t have a date and time of arrival so I’m working with lists that have no firm deadline!

35 Weeks— only 5 weeks til my due date!

Today I’m 35 weeks which means the little guy can arrive (full term) anywhere from 2-7 weeks from now. That is a huge span of time! I’m hoping to finish all my many projects and have everything cleaned, packed and ready to go in just 2 weeks. YIKES! This means of course I have been working overtime on getting things done. The nursery is SO close… and I can’t wait to photograph it for you all to see!

Oh, and the Nesting thing isn’t a joke… it totally hit me that I need to CLEAN and ORGANIZE everything and that I HAD to get it done before the little guy came into our lives. I will sometimes wake up at 3 in the morning just to work on a project or reorganize the bathroom. Our closets have never looked better in 5 years of marriage! I’m hoping this instinct stays with me after baby gets here!

* Read on for the projects I’ve been working on!*

Projects I’ve been working on:

Chalk Board Storage Boxes for all the Baby Clothes

Using spray paint chalkboard paint I sprayed the outside of three large (room-coordinating) plastic bins. After the paint dried I used chalk to write the various sizes of clothing… this way I don’t have to have EVERY item of clothing we’ve received in his drawers as soon as he gets here. So far I have clothing spanning from 0 to 24 months and find that this is a great way to organize everything. I also think it’ll come in handy as he is getting older because I can rotate the smaller sizes out and continue buying clothing ahead of time and storing in the bins. And, someday…when he is older and not growing as quickly I can convert the boxes to toy storage by just erasing the chalk and re-labeling!

Ikea Spice Racks turned Book Shelves
Source: flickr.com via Jenni on Pinterest

I came across the above photo on Pinterest and knew that I had to have some in the nursery. I love how the racks make it possible to see all the covers of the little guys books. They add a small extra element of art to the room and LATER when he is older he’ll be able to look up and choose the books he wants to read with much more ease.
The spice racks were seriously cheap at Ikea ($4 each!), but came in an unfinished wood color. All of the furniture in the little guy’s room is white so I wanted to make sure these matched as well. Enter in my trusty cans of spray paint. After just a couple of coats of white paint the shelves were ready to go!

Making the Mobile
I really wanted to make the mobile for the nursery. I had several that I was choosing from… check out these amazing handmade mobiles:
Image Credit Top Left Clockwise: Martha Stewart, Lil Sprout Creations on Etsy, Jordan Fereny on Project Wedding
My favorite was actually the really pretty strips of vellum sewn together, but I couldn’t find vellum in the colors of his room and I wanted to get the project done so I went with my second favorite… of course a mobile by Martha! I’ll be putting up a post in the next few weeks detailing how I made the mobile. Here is the finished project…well, except that I did lower it a bit.
(excuse the mess in the rest of the room…a work in progress people!)
Robot Paintings

I’m not the most amazing artist, but I can draw a mean little cartoon. I really wanted to add some of my own art into the room so I decided to create 4 different robot paintings using the coordinating colors of the room. I bought 4 square canvases and painted each with a color that I want featured throughout the room. I then painted a different robot in white on each of the canvases. I think they turned out pretty cute… my favorite is the blue painting! These are just photos from my phone, but plan on having full room photos soon.

Birth Plan and Nurse Gifts
We are SERIOUSLY hoping to do this thing naturally. We also have a few specific requests that we are hoping won’t be too much for the birth plan, but regardless plan to add them. So, as we are printing off copies for the nurses that will attend to me (a screaming lady with control issues) we are hoping to make the whole process go easier and show our appreciation by also giving the nurses small gifts. I honestly was surprised that my hubby went with me on this one (why spend more money?)… but, he was totally on board and even helped me pick out items for the gifts! We filled little buckets (found at target in their $1 section) with goodies that we thought the nurses could use or would enjoy. We opted out of adding things that could melt because we plan on putting all our bags in the car waiting for labor to begin. Each bucket has cookies, gum, candy, iced latte packs, small note cards, and a pen. I finished off each bucket with a cellophane bag, ribbon and a printed out thank you card.

These are just the projects related to the house and baby! I’ve also been working on a few birthday  projects for some of the lovely people in my life. I’m excited about sharing some of those projects over the next few weeks. I’ve actually been so back logged on projects/recipes/parties that I have a lot of catch up to do on the blog. I’m working hard today getting some posts together so that you can catch up on all the things going on over here. Who would have guessed that summer would be SO busy!

What projects have you been working on lately? I’d love to see some of the items you are creating and will totally visit your blog or check out the photos if you add a link in the comments! 
~*~
Also, don’t forget about entering our current {GIVEAWAY}