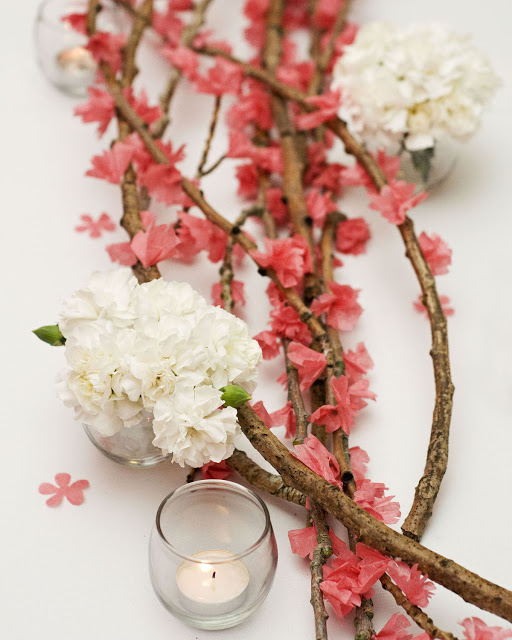
If you are a fan of the Love in Blossom photoshoot that I featured a while back…
(and that was featured on Hostess with the Mostess)
then you were possibly waiting for these DIY posts!
**By the way, if you use any of these DIY projects I’d LOVE to see pictures!**
Just e-mail me at Jenni[at]awellcraftedparty.com
Well…with no further hullabaloo…
~*~
DIY Cherry Blossom Branches
Cherry Blossom BranchesSupplies:
Branches
Pink Tissue Paper cut into 1 inch squares
Pen or Pencil
Hot Glue
Branches
Pink Tissue Paper cut into 1 inch squares
Pen or Pencil
Hot Glue
Step One:
The project works best if the tissue paper is cut several sheets of paper at a time and not as a single sheet— 5 layers of tissue paper work best.
Fold tissue paper squares on the diagonal. And then fold again similar to making a paper snowflake.
Round the straight side of the now triangle piece of tissue paper.
Put a notch in the center of the of rounded edge.
Step Two:
Separate the tissue layers and twist around the end of a pen or pencil. Step Three:
Placing a dab of hot glue on the branch attach the tissue paper to the branch using the pen or pencil.
Continue placing the tissue paper on the branches twisting the blossoms around the branch.
Notes:
Branches can be purchased on-line or found in your own backyard.
***There are similar projects featured on both the Martha Stewart and Good House Keeping websites. I certainly wasn’t the first person to think of this, but I do like how my project turned out.**Sources:
Blossom Tissue Paper: from www.paper-source.com
BIG THANK YOU
to Hostess With the Mostess for featuring this DIY
and to Capturing Grace Photography for taking such beautiful photos!


